Elevate Your Visual Narratives with Time Lapse Shooting and Processing
Understanding Time Lapse Shooting
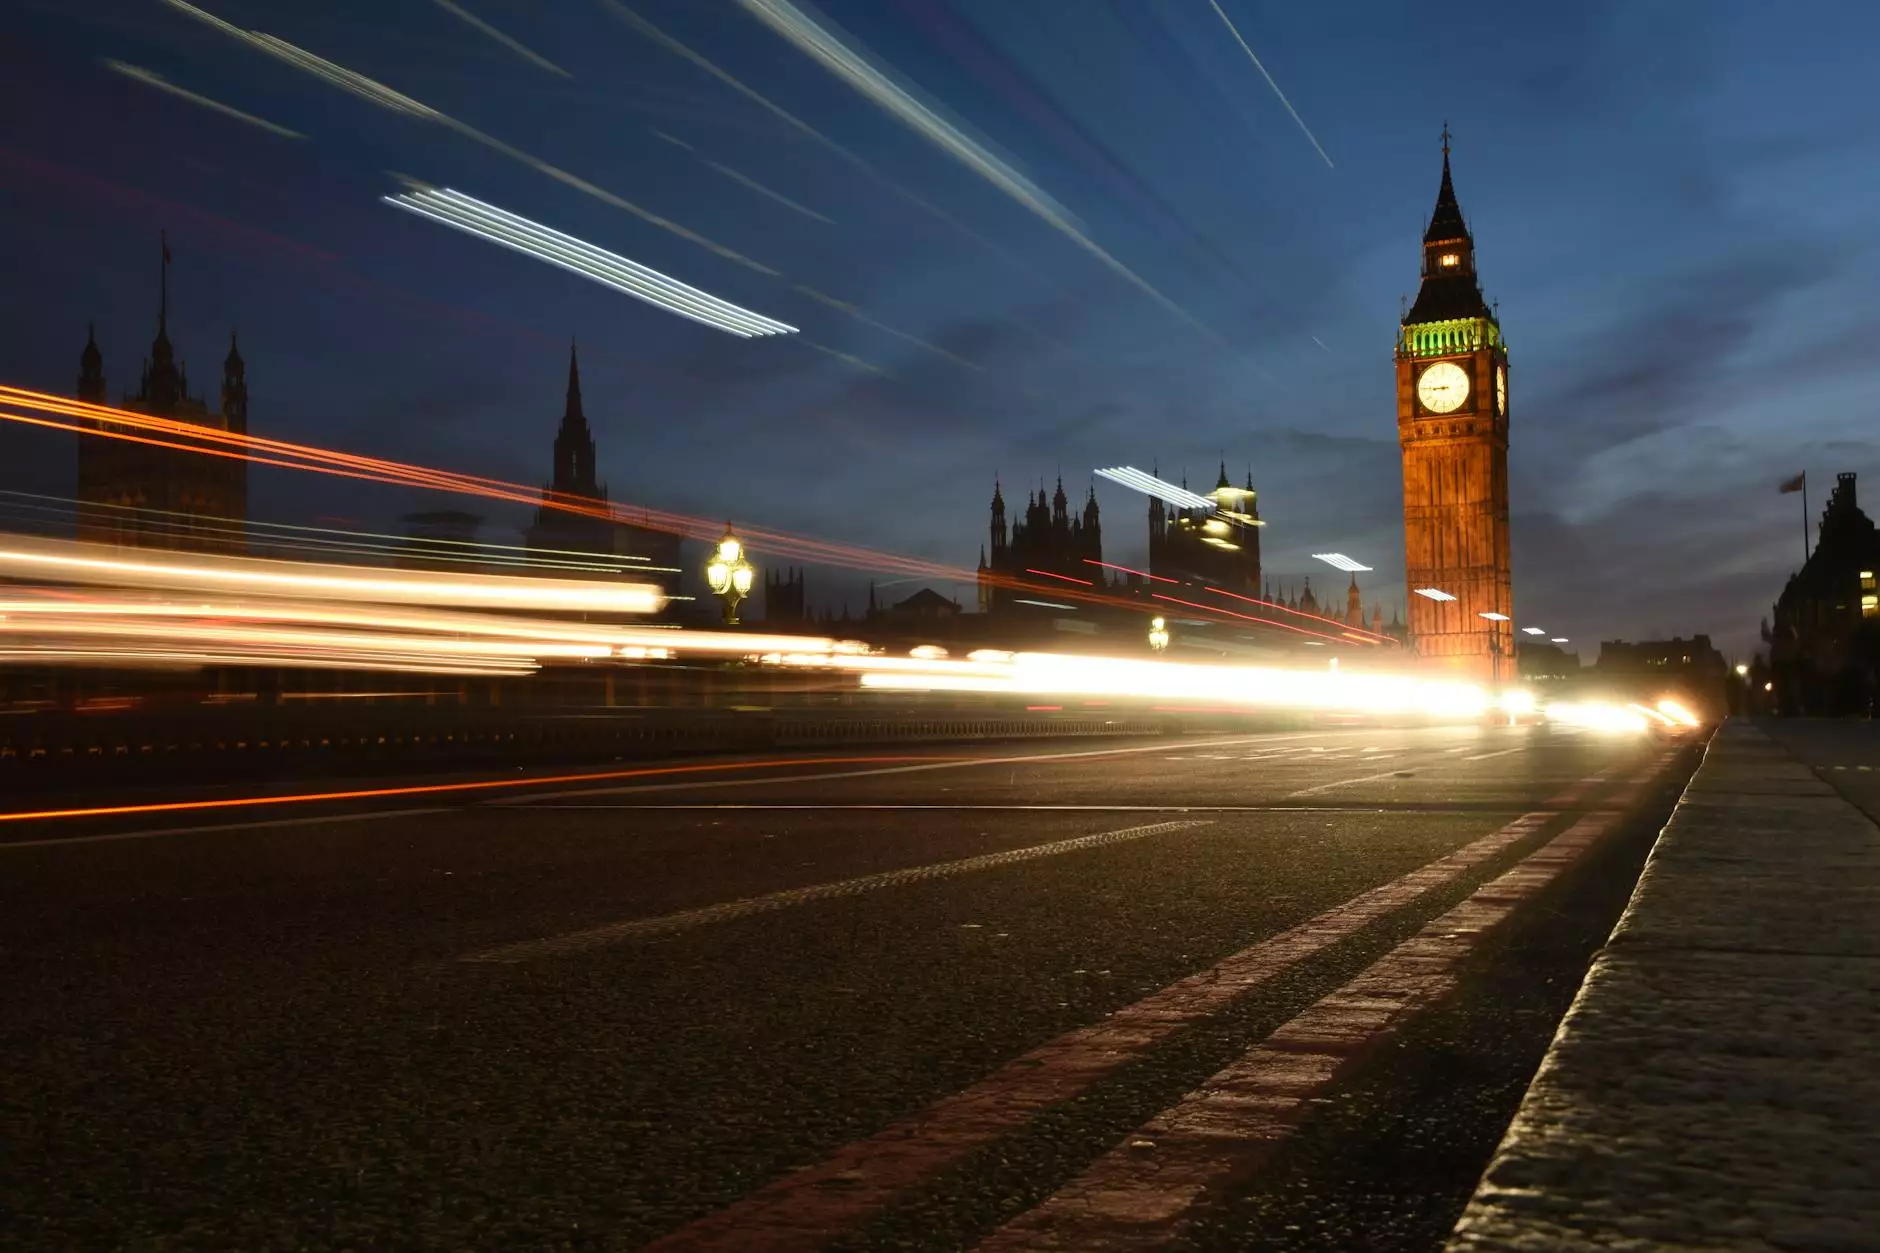
Time lapse shooting is a captivating technique that condenses hours, days, or even months into a few stunning minutes. This method allows photographers to create unique visual stories, capturing the essence of time in a powerful way. By taking photos at set intervals and then compiling them into a seamless video, photographers can showcase changes that are normally too slow for the naked eye to appreciate.
Why Choose Time Lapse for Your Photography Business?
The integration of time lapse shooting and processing can significantly elevate your photography services, particularly in competitive fields such as real estate. Here are some compelling reasons to include this technique in your offerings:
- Showcasing Development: Time lapse is perfect for showcasing property development, renovations, and landscaping projects, allowing potential buyers to see the transformation over time.
- Captivating Visuals: Stunning visual content is more likely to capture audience attention on social media and websites, leading to increased engagement and interest.
- Enhanced Storytelling: Time lapse allows photographers to tell a story — from the beginning of a construction project to the unveiling of a beautiful finished property.
- Unique Selling Point: Offering time lapse video services can distinguish your business from competitors, providing clients with something innovative and exciting.
Essential Equipment for Time Lapse Shooting
To create high-quality time lapse videos, it's crucial to have the right equipment. Here’s a comprehensive list of necessary tools:
- Camera: A DSLR or mirrorless camera with manual settings provides the best control over the shooting process. Look for one that supports interval shooting.
- Tripod: Stability is key in time lapse photography. A sturdy tripod will ensure that your camera remains in the same position throughout the shoot.
- Intervalometer: This device helps automate the shooting process, allowing you to set the interval between shots without manual intervention.
- Editing Software: Post-processing is essential for creating a polished final product. Software such as Adobe Premiere Pro, Final Cut Pro, or dedicated time lapse software can enhance your video quality.
- Additional Accessories: Consider a neutral density filter for bright conditions, extra batteries, and ample storage space for high-resolution images.
Techniques for Successful Time Lapse Shooting
1. Planning Your Shoot
Before starting, it’s important to plan your time lapse shoot effectively. Consider the following:
- Identify Your Subject: Focus on a subject that will change over time; this could be an unfolding event or a natural scene.
- Choose the Right Location: Look for a location with a clear view and minimal distractions that could interfere with your shots.
- Set Clear Objectives: Determine what story you want to tell through your time lapse — this will guide your shooting and editing choices.
2. Camera Settings
Understanding your camera settings is essential for successful time lapse shooting. Here are some key settings to adjust:
- Shutter Speed: A faster shutter speed can help minimize blur, particularly in scenes with movement. Experiment with different speeds to see what works best for your scene.
- Aperture: Use a small aperture (high f-stop number) to increase depth of field, ensuring more of your scene is in focus.
- ISO Settings: Keep the ISO low to reduce noise in your images, especially for nighttime shooting.
3. Shooting Duration and Intervals
The duration of your shoot and the interval between shots are crucial for effective time lapse photography:
- Duration: Determine how long your final time lapse video will be. A common rule is to capture approximately 24 frames per second for smooth playback.
- Intervals: The interval between shots will depend on the speed of the changes in your subject. For fast-moving subjects, a shorter interval (e.g., 1-2 seconds) may be required, while longer intervals (e.g., 10-30 seconds) are suitable for slower changes.
Post-Processing Your Time Lapse Videos
After capturing your images, the next step is processing your time lapse footage. The editing stage is where you can enhance the quality and storytelling aspect of your project:
1. Import and Arrange Your Footage
Import all photos into your chosen editing software and arrange them in the correct sequence. This organization is crucial for a smooth timeline.
2. Adjust Playback Speed
Set the appropriate playback speed according to your planned output duration. Remember to consider the intended viewing platform — social media may require different lengths compared to a professional presentation.
3. Color Correction and Grading
Apply color correction to enhance the visual appeal. Adjust exposure, contrast, and saturation to bring out the best in each frame. Color grading can also provide a stylistic touch that reflects your brand.
4. Add Music or Voiceovers
Incorporating music or voiceovers can enrich the viewer's experience. Choose audio that complements the visuals and enhances the overall narrative.
5. Exporting Your Final Video
Export your final video in a suitable format for your intended platform. Common formats include MP4 for general use due to its wide compatibility.
Marketing Your Time Lapse Services
After mastering the art of time lapse shooting and processing, it’s time to showcase your new skills to potential clients. Here are effective marketing strategies:
- Create a Portfolio: Build an impressive portfolio featuring your time lapse projects. Include before-and-after clips to demonstrate the impact of your work.
- Utilize Social Media: Platforms like Instagram, TikTok, and YouTube are ideal for sharing short clips and engaging with your audience. Create teaser videos or behind-the-scenes stories to generate buzz.
- Networking: Collaborate with other professionals in the industry, such as builders and real estate agents, to promote your services. Offer to create time lapse videos for their projects to show your capabilities.
- Customer Testimonials: Leverage positive feedback from previous clients to build credibility. Ask for testimonials that highlight the unique value of your time lapse services.
Challenges in Time Lapse Photography and Their Solutions
While time lapse photography offers fantastic opportunities, there are also challenges. Here are common issues and how to address them:
1. Unpredictable Weather
Weather can change rapidly, potentially ruining your shoot. Always check the forecast and have a backup plan in case of rain or drastic changes in conditions.
2. Battery Life
Long shooting sessions can drain your camera’s battery quickly. Bring extra batteries and consider using an external power source if available.
3. Equipment Stability
Easily affected by vibrations and wind, ensure your tripod is secure. Weigh down your tripod if necessary when shooting outdoors.
Conclusion
Incorporating time lapse shooting and processing into your photography business can transform your offerings and captivate clients looking for unique visual storytelling. With the right equipment, techniques, and marketing strategies, you can stand out in the competitive landscape of photography services, particularly in niches like real estate.
Time lapse photography not only enhances the way you showcase projects, but also enriches the overall experience for your clients. Embrace this powerful technique, and watch your photography business flourish with bonomotion.com leading the way in creative visual content.